My daughters are both Irish step dancers, and we usually go to the Phoenix Halloween Feis (Irish dancing competition), where they have a very special costume competition just for fun each year. My daughter's friend dressed as Raggedy Ann, and her mom asked if I could help make a curly yarn wig to go with the costume.
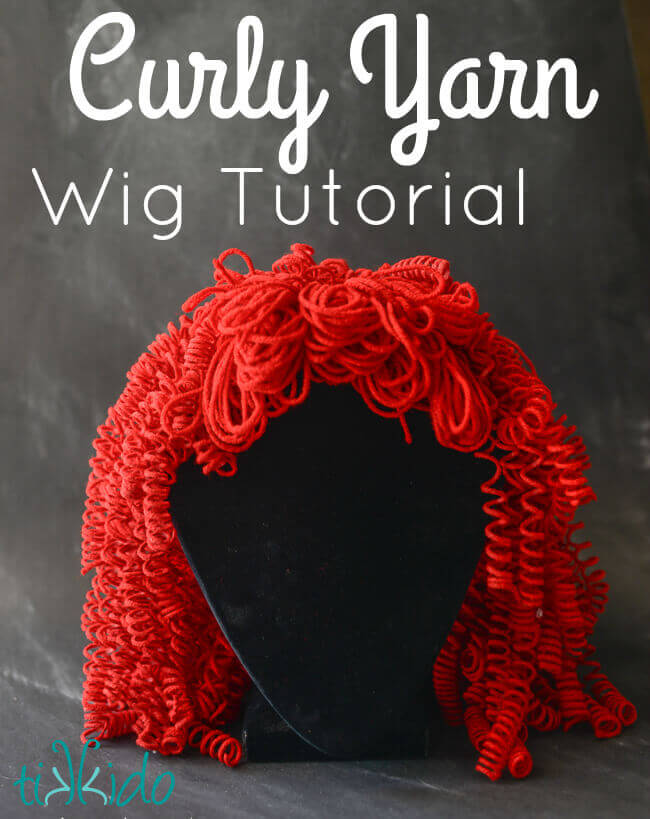
Kind of a hybrid between an Irish dancing curly wig (so bouncy!) and a classic Raggedy Ann look.

Doesn't she look absolutely adorable ready to go on stage?
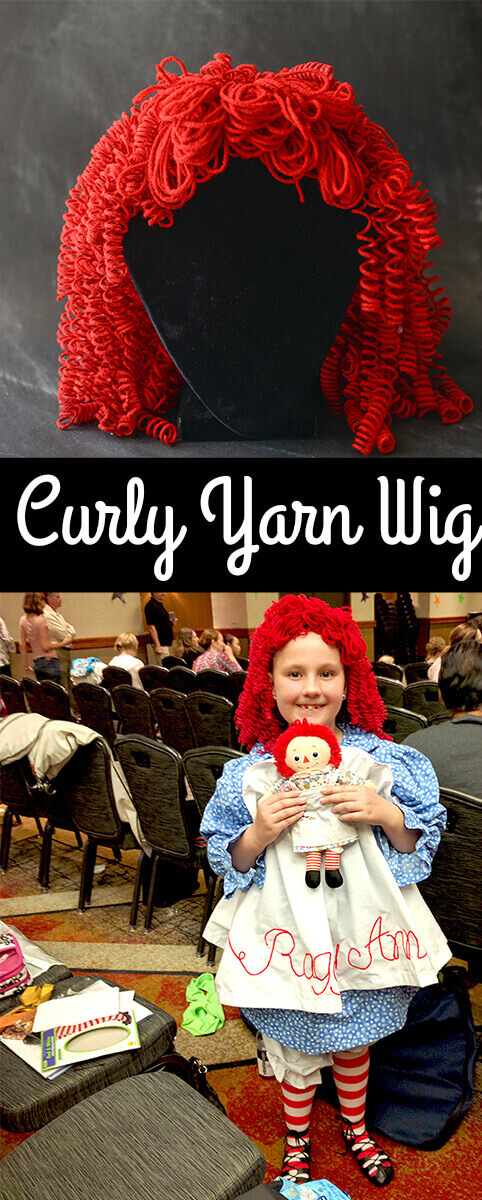
This yarn wig technique worked fabulously for the Irish dancing Raggedy Ann costume, but I think it would also be great for making an impressive Merida wig, or La La Loopsy wig. I also kind of want to make a rainbow unicorn mane using rainbow yarn and this basic technique.
Ready for all the details and the full tutorial? Head to Page Two.

[pagebreak]
How to Make A Curly Yarn Wig for a Raggedy Ann or Merida Costume
Curly Yarn Wig Materials:
- yarn
- large straws (bubble tea straws or milkshake straws work fabulously)
- liquid starch
- wig weaving cap
- heavy duty button thread
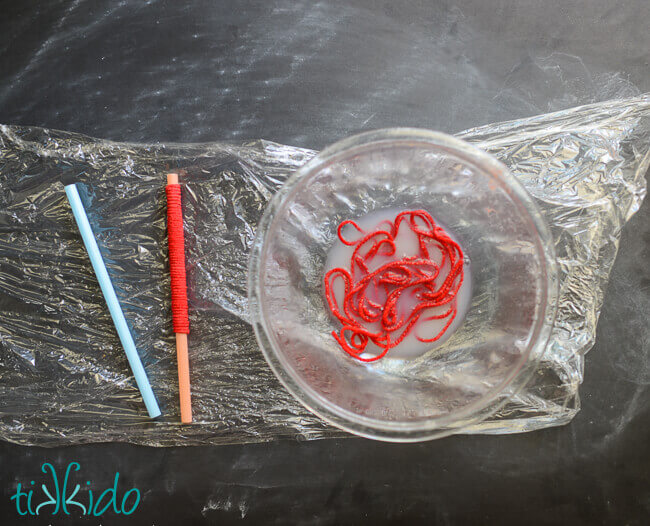
Cut lengths of your yarn first. I cut each of mine about the width of my arms spread out, or a little longer.
Soak the lengths of yarn in undiluted liquid starch.
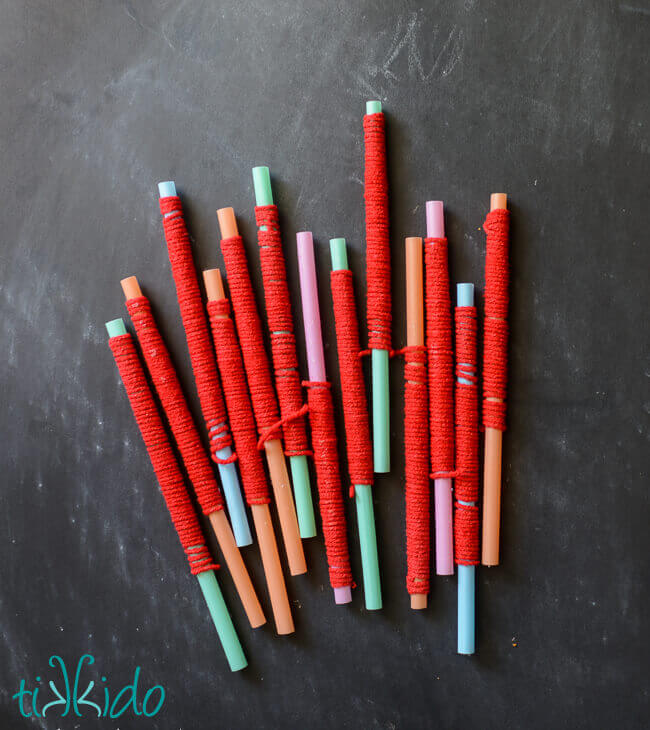
Squeeze out excess starch from the yarn, then wrap the yarn around the milkshake straws (buy here). You can let it dry on its own, or put in the oven at 200-225 degrees for about an hour to bake it dry. The straws don't melt at that temperature, don't worry.
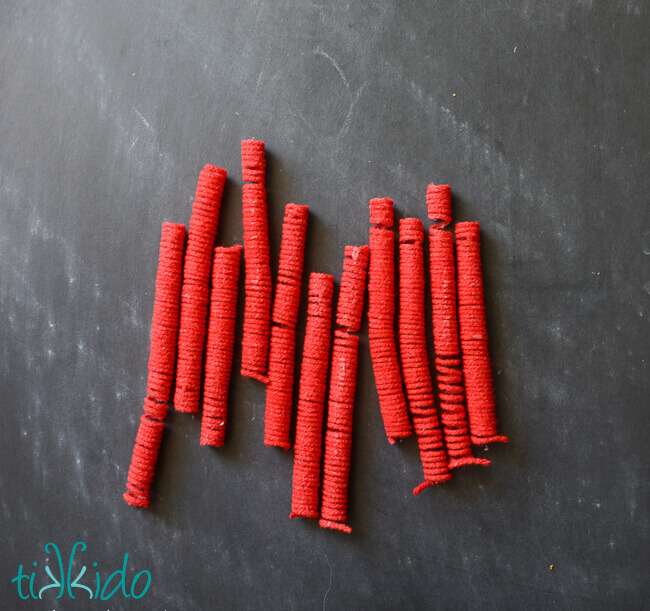
Once the yarn is completely dry and cool, slip the yarn off the straws.
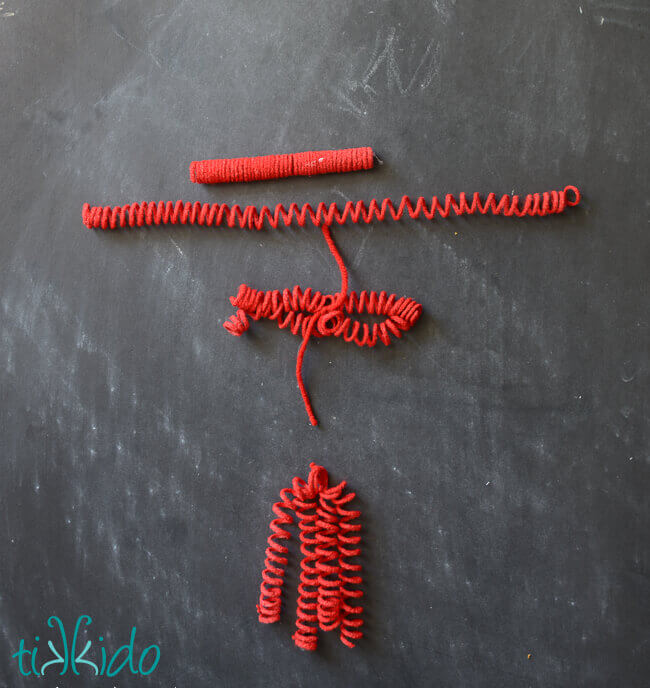
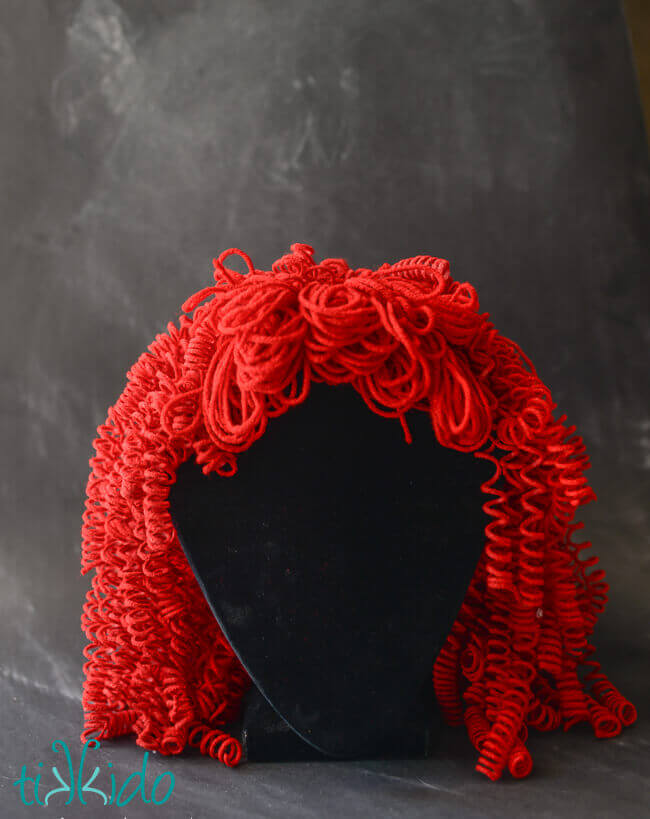
For my wig, I didn't need each curl to be particularly long, so each straw curl turned into a bundle of four curls, which I then sewed to the wig cap. First I gently pulled the tight yarn curl apart (so it would bounce and lengthen), then I folded that long curl in half, and used another piece of yarn to tie the curls together in the center. I then cut the excess yarn from the center, and cut the looped curl on one side into two separate curls. These clusters of four curls are what I attached to the wig cap (way better than sewing each one on individually!).
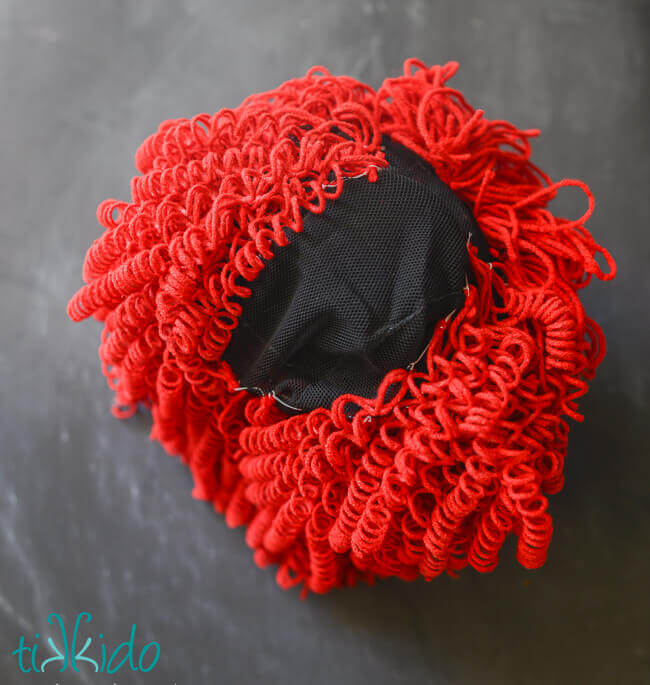
Use heavy duty button thread (buy here) to sew the curl clusters to the wig cap. You don't have to cover the entire surface of the wig cap with the yarn, but instead can space them about an inch apart. Start at the perimeter of the wig cap and work your way toward the crown.
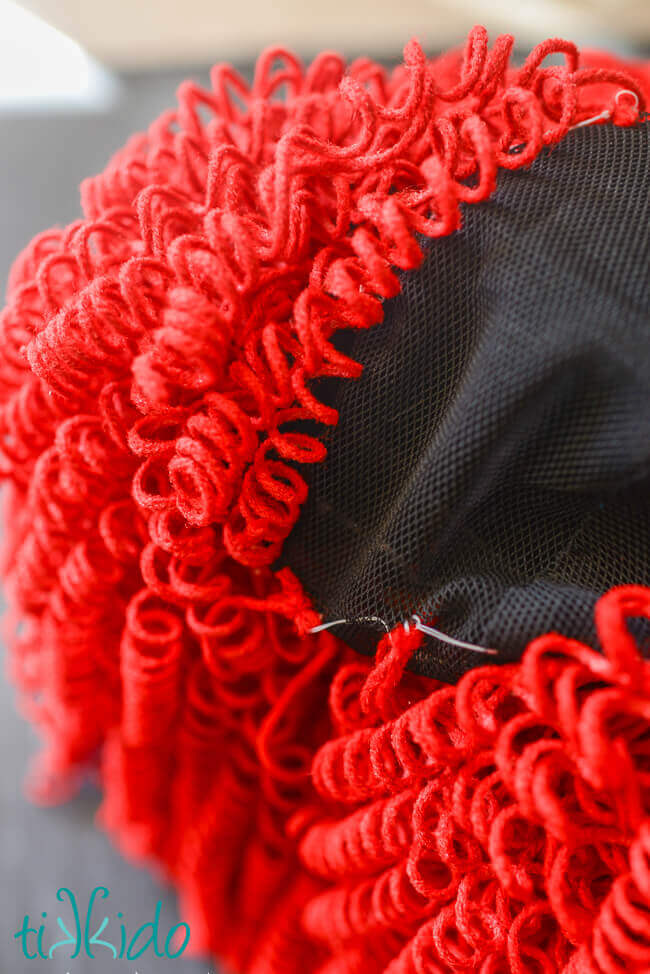
You can see the spacing a little better in this photo. The curls have so much volume that you really don't have to do place them too closely together.
You know, I'll bet a hot glue gun would have totally worked, too. If working with needle and thread isn't your thing, don't stress about it and glue gun that sucker. It'll be absolutely fine for costume purposes.
Even spacing the curl clusters out, it takes a LOT of yarn to make a wig like this. I lost count, but I know I used north of 100 curl clusters to make this wig, and I really made that last batch of curls stretch because I'd run out of time.
Don't have the time or the crafty inclination to make a wig? There are cute yarn wigs you can buy, and this looks like a terrific option for a Merida costume wig.

.png)