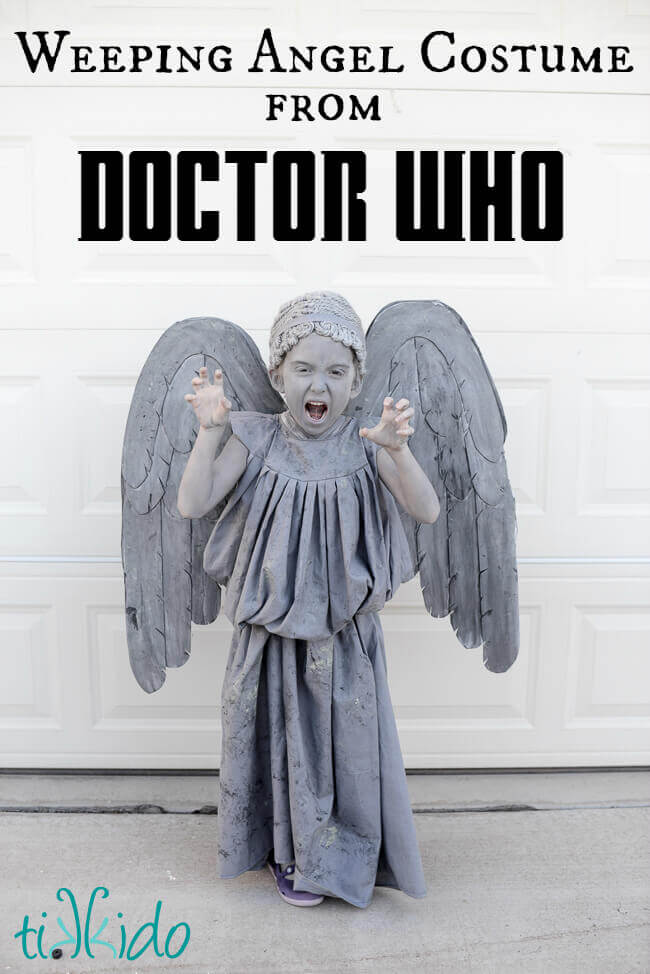
My six year old daughter had a Doctor Who themed birthday party this year--and in fact, what she really wanted was a Weeping Angel party. She graciously allowed me to do Doctor Who more generally (so as not to completely freak out her other first grade friends), as long as I promised to make her a weeping angel costume for Halloween.
We were on a family vacation in England until just a few days before Halloween, but a promise is a promise! I started making the costume the night before! Nothing like last-minute panic to help me get things done.
I didn't use a pattern for the dress. I traced the neckline of one of Niamh's t-shirts to get the general shape for the yolk of the dress, then just sewed on two full-width rectangles of fabric to the yolk, one to the front, one to the back, and joined them at the sides. I'm sorry I didn't take process pictures, like I usually do. But I really did start this the night before and the lighting was just awful!
You could also easily make a pillowcase dress and get a very similar effect, with less effort. Not that what I did involved a lot of effort, but I'm very comfortable with a "hey, let's jump right in and try this, I have an idea and I don't need no stinkin' patterns or instructions!" attitude. If you like more guidance, a pillowcase dress would be the perfect, very easy sewing project for this costume.
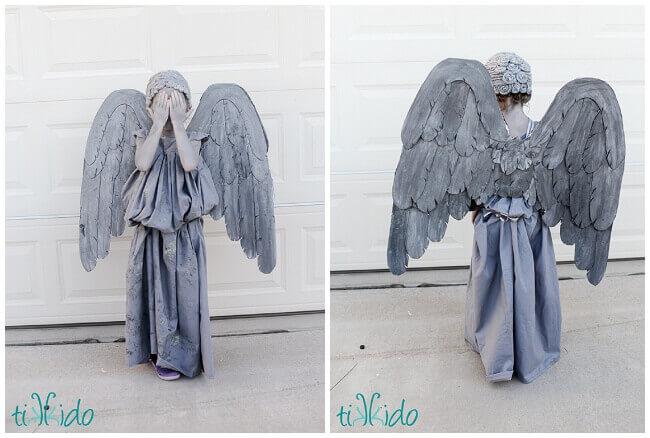
The wings were made from one sheet of foam core poster board and six large sheets of craft foam.
I used the full width of the foam core board for the width of the wings, and cut out the general wing shape. Since I used the long dimension as the width, the wings weren't long enough--but I wasn't concerned, since I planned to make the pretty part out of craft foam. I just needed the foam core to provide some rigid structure.
I cut feather shapes out of my craft foam, and used a hot glue gun to attach them to the foam core form. You can see the foam core sandwiched between the foam feathers on the front and back in the shot above.
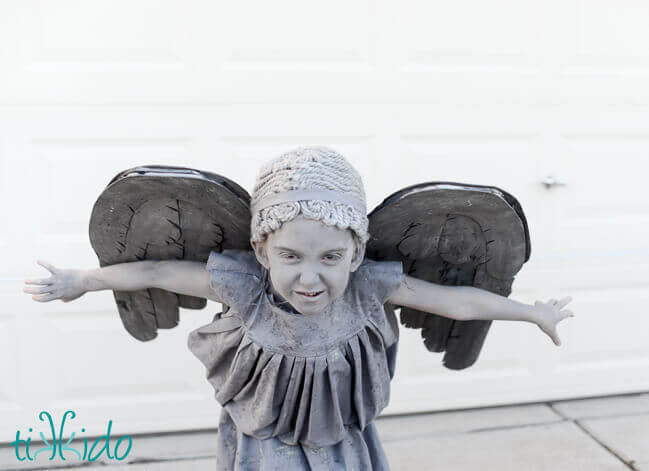
I had to use white foam core (no grey or black left in stock and the store I went to), so I painted it with a mix of grey and black paint, and highlighted with a bit of mossy/lichen green paint.

Niamh's hair is short and incredibly whispy and fine, so I knew that just using grey hairspray wasn't going to make her look anything like a weeping angel. I needed a hat/wig. I found some fabulous chunky grey yarn on sale at Joann Fabrics, and knew that would make great faux stone hair, but I needed something to put it on.
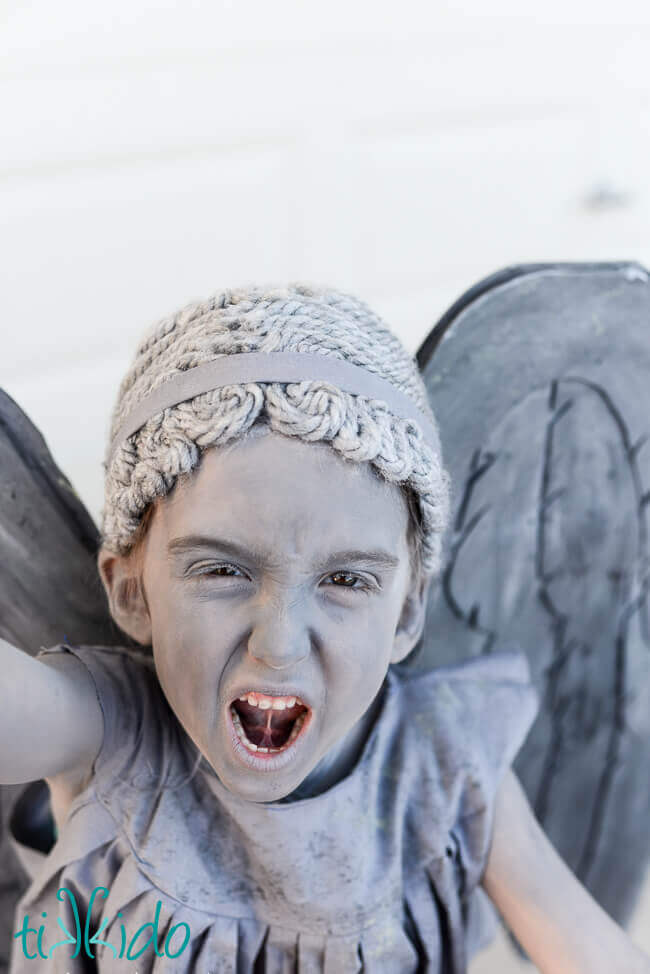
I ended up wrapping Niamh's head in saran wrap, and then covered the saran wrap with tape to create a solid hat form perfectly formed to her head. (I was inspired by DIY duct tape dress forms.) I intended to use grey duct tape, which would have been absolutely perfect as an under-layer, but somehow our roll of duct tape has gone missing, so I used clear packing tape. It totally worked, though I had to be a little more careful not to leave gaps when I was gluing on the yarn hair.
I used my trusty hot glue gun to attach the yarn to the tape hat. I was a little worried it might not stick very well to the slick packing tape, but it worked beautifully. Whew. It's not like I left myself a lot of time to come up with other options!
The downside to this particular method of making the wig? It was hot. It was saran wrap inside, after all. But it did help keep Niamh warm while she was trick-or-treating sleeveless last Saturday! We're in Phoenix, so that's not much of a stretch, I know. I'll bet you could make a more breathable version of the hat form using papier-mâché if you had more time than I did.

Don't blink!

.png)