I have two daughters, and they both love hair accessories (or "pretty hairs" as we call them--my oldest daughter dubbed them that when she was a toddler and the name stuck). That's not to say that they wear them all that often--far too busy having fun than sitting around thinking about accessorizing. But they do truly enjoy owning hair accessories, and having that option, at least. ;-)
.JPG)
I indulge, mostly because I like making the hair bows and clips and headbands (so at least I'm not spending a ton of money on it), and because they look so darn cute when they do wear them!
.JPG)
I took the Rain Gutter Regatta party as an opportunity to have fun making a bunch of nautical hair accessories for the kids, and today, I'm going to share how I made the sailing knot headbands and hair clips.
Materials to Make Nautical Knot Headbands:
- plain headband
- rope
- glue gun
- fabric (optional)
- ribbon (optional)
.JPG)
For the most basic version of the nautical knot headband, you'll want some rope (I used two sizes--one is technically twisted twine, but it looks like mini rope) and a plain headband. The headband can be either metal or plastic. I special ordered my metal headbands in bulk from U.S. Comb, but their website doesn't seem to exist any more, so it's a good thing I got out of the tiara making business when I did, I guess! You can get plastic or fabric-covered plastic headbands inexpensively at any grocery or drug store, the dollar store, or on Amazon.
.JPG)
Start by making some decorative nautical knots. These are all Carrick Bend Mat knots, but you can see how I made them look different by making them more tightly or loosely spaced, and by doing two or three passes through. I'm not going to teach you how to make these knots, because Animatedknots.com does a FAR better job than I would at that, and they already have many fine, easy to follow tutorials. I used their Carrick Bend Mat Knot Tutorial to make all of the knots in the above picture. So go there, make some pretty knots, and come back for the rest of the headband tutorial.
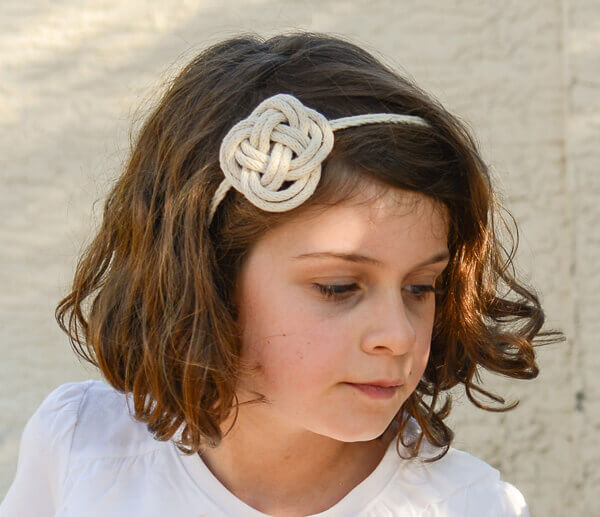
For the most basic knot headband, all I did was glue two strands of the narrow rope (twine) to a metal headband, and then glue a knot on top. Easy peasy.
.JPG)
I wanted to play around with some of the fabrics I'd used in other parts of the party, like this classic seersucker that I used in some of the appliqued shirts I made, so I developed this style of nautical knot headband, too.
.JPG)
I started by cutting a ribbon of seersucker fabric and gluing it to my inexpensive plastic headband (bought this one in a multi pack at the grocery store).
.JPG)
I trimmed away excess fabric, and glued the edges to the underside of the headband.
.JPG)
I then glued a pretty gold ribbon to the inside of the headband to cover the raw edges of the fabric. Voila--instant matching headband!
.JPG)
I could have just glued one of the carrick bend mat knots on to the fabric covered headband, but I wanted something a little more girly and fun, so I cut a second ribbon of my seersucker fabric. I liked the texture of the frayed edge of the fabric, so I intentionally used that side as my visible, outside fabric edge. I used my low temperature glue gun to ruffle the fabric and glue it to the back of one of my decorative rope knots.
(1).JPG)
That was easily glued to my fabric covered headband, and made an absolutely darling, easy to make hair accessory.
.JPG)
I had some extra rope knots, so I decided to turn some of them into easy hair clips. I use alligator style hair clips, which are available online and at places like Sally's Beauty Supply.
Cover the top half of the hair clip with a short piece of ribbon. This both looks nice, and helps you not accidentally glue both parts of the hair clip together when you add the pretty bit.
.JPG)
Glue the hair clip to the back side of the Carrick bend mat knot. These looked charming on the children, but I could definitely see them being worn by bridesmaids at a nautical wedding, too.
I made some seriously cute hair bows using mix-and-match plaids, too, and will have the tutorial for those in tomorrow's blog post.

.png)