Have you ever wondered how to make a fascinator? Making feathery, fun fascinators is actually very easy. I'm going to show you two styles of DIY fascinators and give you the basics to create your own amazing fascinators.
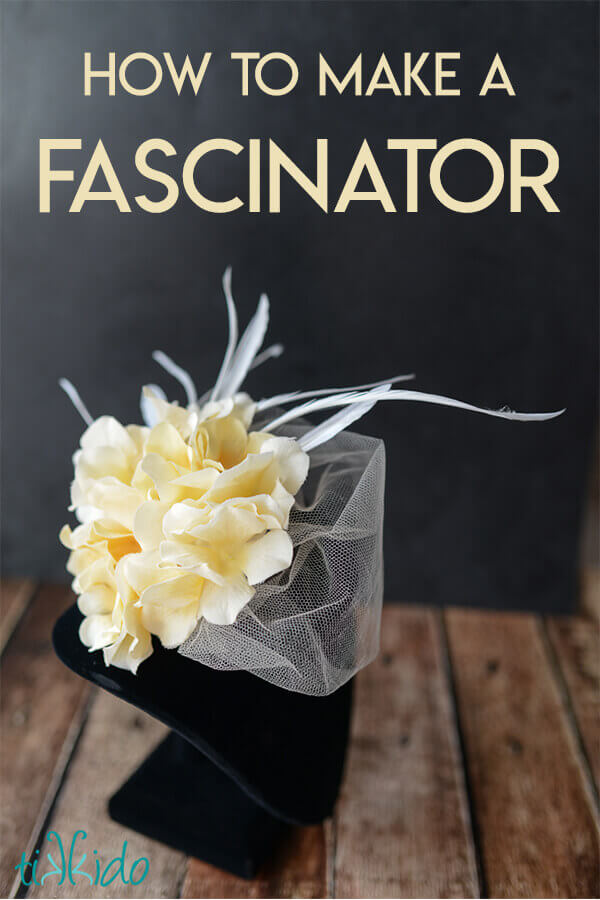
I'm pretty sure it's impossible to be in a bad mood if you're wearing feathers on your head. There's just something so playful and fun, it lifts your spirits. I knew I wanted everyone to be able to have that experience at Mary's High Tea birthday, so I had a ton of fun designing a selection of fascinators for the guests to wear (and keep as a party favor).
Here are a few of the designs I whipped up one evening:
Yay, fun fascinators for all!
I'm going to show you how I made two of the hat styles--and that will give you the basic skills you need to riff on the concept and create your own designs.
Basic Materials for Making a DIY Fascinator Hat:
- Assorted craft feathers
- plain headband
- silk flowers
- hot glue gun
- fabric
- felt
- cardboard circles
- Russian veiling or tulle
If you look back to the very earliest posts on this blog, you'll see that it started out as a wedding blog for my old business, Tradewind Tiaras. Yup, I spent 13 years as a tiara and veil designer. So I had all of these things in my craft stash already, but I didn't use anything difficult to find or expensive for this project.
Materials for a Disc Shaped Fascinator:
- an 8" cardboard cake round
- goose biots
- satin fabric
- felt
- silk flowers
- plain headband
- glue gun
Start by cutting the satin fabric slightly larger than the cardboard circle (yes, I used an 8" cake round). Cut a felt circle slightly smaller than the cardboard circle. I used green here so it would be easy for you to see, but on the hats for the party, I used felt that matched the color of the fabric I used to cover the cardboard.
Glue the satin to the top side of the cardboard round and secure on the underside with the hot glue gun. Then glue the felt circle on the bottom to cover up the raw edges and unsightly mess.
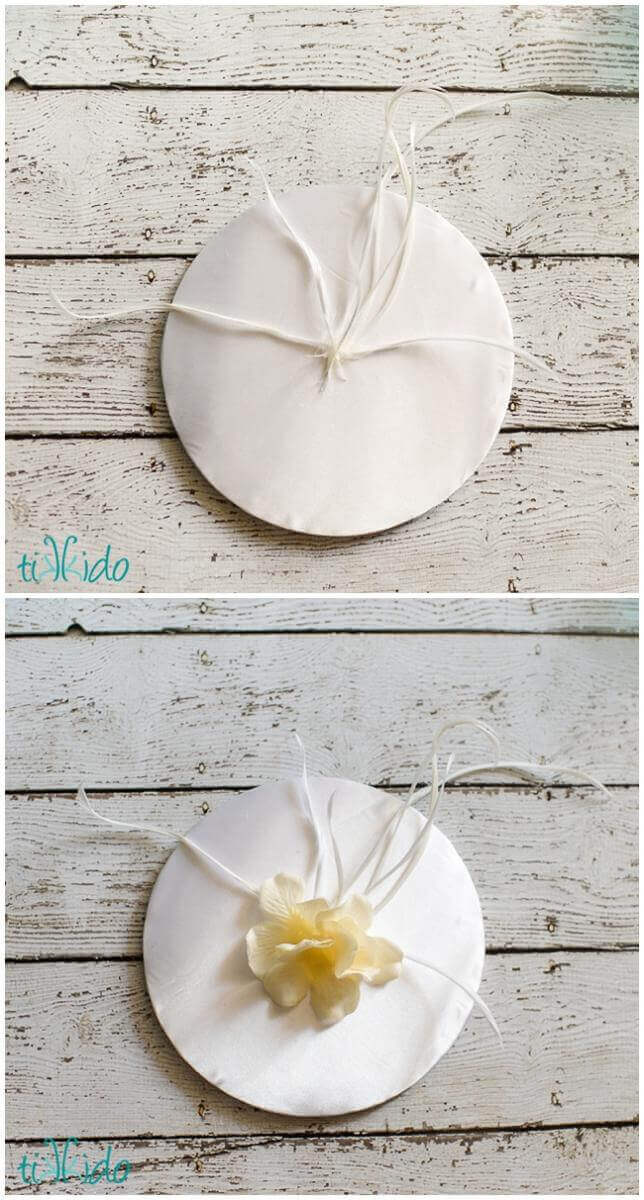
Flip over and glue feathers to the center, and then cover up the messy bit with some silk flowers, or a brooch, or some lace... whatever you want!
Glue the hat to the headband at a jaunty angle. Glue guns don't actually hold on to metal particularly well, so glue a small additional piece of felt over the inside of the headband, effectively sandwiching the headband between felt. That will keep it nice and secure.
Fancy, no?
How to Make a Feather and Flower Fascinator:
- felt
- artificial flowers
- goose biots
- craft feathers
- hot glue gun
- Russian netting or tulle
- plain metal headband
Cut a circle of felt approximately four inches in diameter (or whatever size you want, really). Glue on some feathers to the top third or so of the circle.
Glue silk flowers tightly over the entire surface of the felt circle. These flowers came from a silk hydrangea spray I bought on sale--I just pulled the flower petals right off the plastic stems.
Just as with the earlier fascinator style, glue the headband to the felt circle, and then keep it secure by sandwiching the headband between the first circle and a second, smaller scrap of felt.
If you'd like to add a bit of veiling, the standard material is called Russian netting or Russian veiling. It comes in any color you could want. Or you could use tulle, which you can get in any craft store. I used Russian netting for the hats at the party, but used up my stock before I got a good product shot, so in this photo, I used silk tulle. Just because I had it, and it's pretty. And now that I don't make veils any more, what else am I going to do with it, really? But the inexpensive craft tulle totally works, too. Cut a piece of whatever netting you're using about 6"x12". Gather at either short end, and hot glue to the underside of the fascinator. netting, obviously, has holes, so don't try to press it down with your fingers, or you'll just end up gluing your fingers. That's why you see two extra little scraps of felt on the underside in the photo above: to protect my fingers as I glued down the tulle to the hat.
Here's the birthday girl wearing the finished product! Doesn't it look fabulous on her?
So much fun to wear! You know, the Kentucky Derby isn't all that far away... Yay, more opportunities for fancy hats!


.png)