
No gnome party would be complete without fluffy white beards--even if the party is for all girls!

They're silly fun, and make fabulous photo props.
Materials for a Gnome or Santa Beard
- white felt
- wool roving
- thin elastic cord
1) First, cut a piece of white felt approximately 4"x 3" in size. Basically, just big enough to cut a mouth hole and have something to attach the fluffy bits to.

Cut a mouth shaped hole in the middle. Trim the corners of the rectangle so that the shape follows the general lines of the mouth cut-out. You don't have to worry about this part looking pretty; it's all going to be hidden under the wool.
2) Pull apart lengths of roving as long as you want the beard to be. Mine were between 6 and 10 inches long.
What is Wool Roving?

It's...well...I'm no knitter/spinner/textile person. But it's fluffy wool ropeish stuff you can get from yarn shops. People this barely-processed wool into yarn, or use it to make felted wool objects like these felt acorns.
Spinner/knitter/textile type people could probably give you a much better description and definition. But I can tell you it's really inexpensive, and makes completely awesome beards! It comes in a variety of colors and can be dyed, if you don't need a white beard.
How to Make a Gnome or Santa Beard
If you just grasp the roving with two hands and pull apart, nothing is going to happen. That stuff is
strong. But if you start pulling it apart width-wise at the point you want to separate the roving, it quickly loses that integrity and strength and can be easily pulled apart.
Sure, you could cut the roving with scissors, but pulling it apart will give you a tapered, natural end to your beard. Way better than a blunt cut.
Sew or glue the roving for the chin part of the beard to one side of the felt.

Once the chin bits have been sewn on, flip the long part of the beard over the seam, so you don't see where it's sewn to the felt.
Mustache for DIY Gnome or Santa Beard
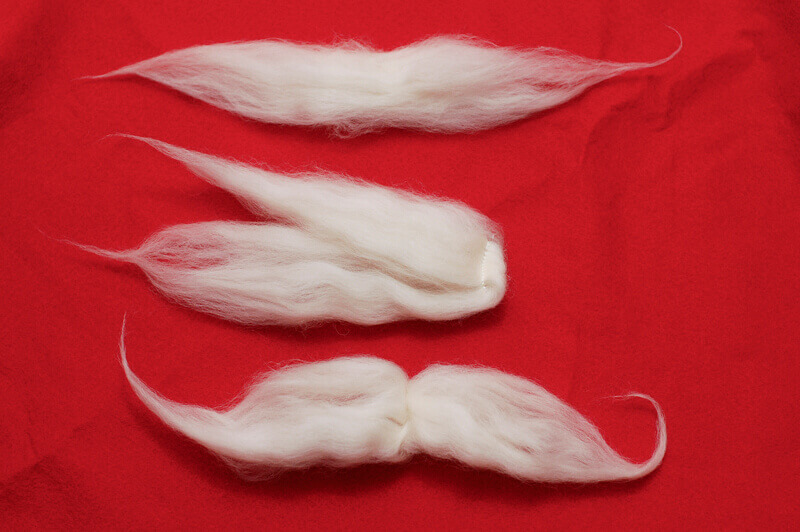
First, pull a length of roving for the mustache. You can make it as ridiculous and huge as you'd like. Fold the mustache roving in half, and stitch at the fold. Unfold, and you have a gorgeous mustache, ready to go!
No sew version: Take a piece of white string or thread, and tie a knot tightly around the center of the roving. That will give you a very similar effect, without having to pull out the sewing machine.
A little body adhesive or double stick tape and this would make a really awesome costume component all by itself! (Barbershop quartet photo booth props for an ice cream party? Wild west party? 'Stache bash?)
Glue the mustache to the top part of felt foundation (the only part still visible at this point).
Attach the elastic to create a band that goes around the head. I used a stapler for this part of the project, but you could easily just punch a hole through the felt and tie the elastic on.
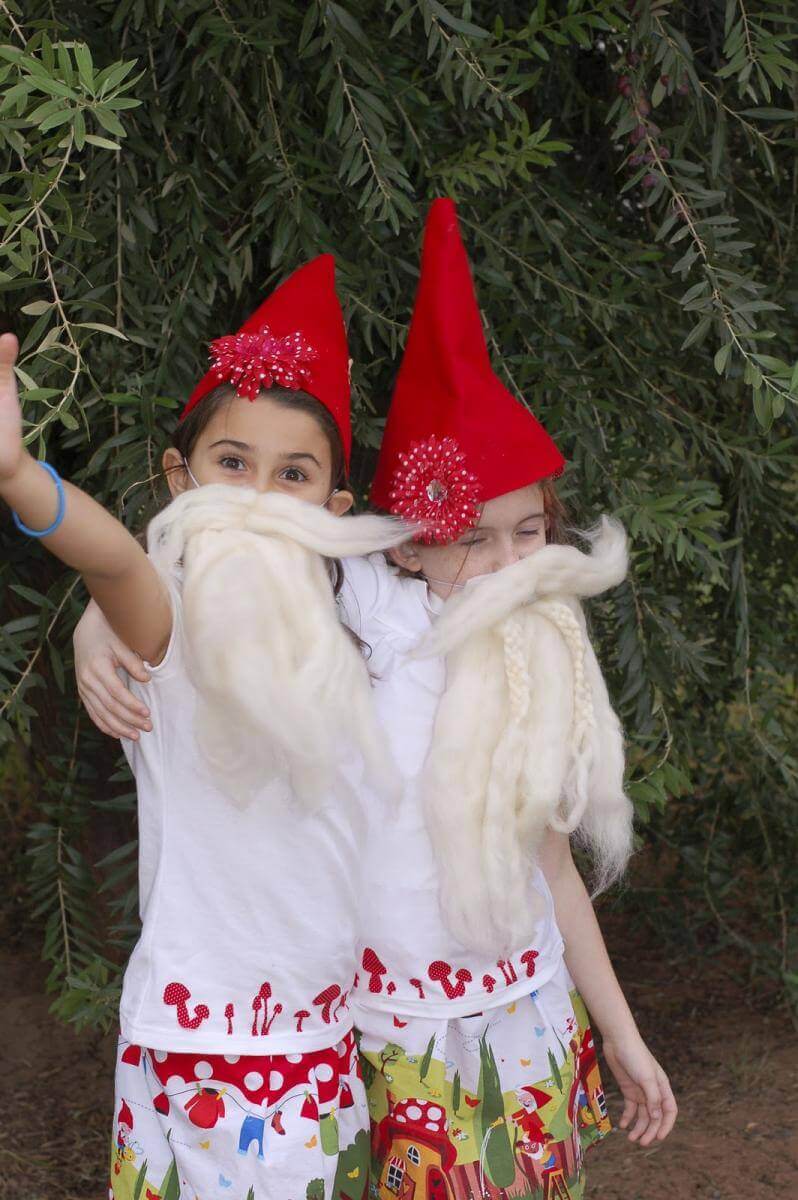
I may have made these for a gnome party, but you can bet they'll be making an appearance in the photo booth at our annual Christmas party! (Maybe without the four-ply braids, however. ;-) )
Other Gnome Tutorials and Posts You Might Like

.png)
Comments
SO cute! Found your post on google! Thanks! <...