Homemade marshmallows are undeniably delicious--so, so much more than the store bought varieties. They're light and fluffy and flavorful in ways I'd never imagined a marshmallow could be. This marshmallow recipe is sure to make your taste buds jump for joy. And a lot of things very sticky. But it's worth it. ;-)

So when my oldest daughter decided that she wanted to do a science fair project centered around homemade marshmallows and how gelatin content affects gooeyness, I fully supported her. Despite the fact that I've made homemade marshmallows before. Once. Because it was a pain in the ass. A delicious one, but a pain, nonetheless.

Our Favorite Homemade Marshmallow Ingredients:
- 2 envelopes unflavored gelatin
- 1 1/2 cup water, divided
- 3 cups granulated sugar
- 1 1/4 cup light corn syrup
- 1/4 teaspoon salt
- 2 teaspoons vanilla
- powdered sugar (for dusting)
We used Martha Stewart's homemade marshmallow recipe as our control recipe, and experimented with gelatin content from there. The ingredients above are our own personal preference for gelatin content, after our experimentation.

Generously coat a 9 x 13 pan with oil. We halved the recipe for each batch in our experiment, but the recipe above is for a full 9 x 13 pan batch. We also lined the pan with parchment paper. Marshmallow is sticky stuff!

We tested the standard (Martha Stewart endorsed) level of gelatin, twice the called-for amount of gelatin, and half the amount of gelatin.

All variations of the recipe used the same technique:
Put the 3/4 cup water in a mixing bowl. Rain the gelatin down on top. Don't just dump it in there, or it will clump. You need to gently shake the package back and forth, raining the powdered gelatin in an even layer on the top of the water, back and forth, as many times as you need to to get fabulously even coverage. (This is something I learned when my mom was in school to become a pastry chef, and was studying with the then-reigning National Pastry Champions. If they tell me to do something, I listen!)
Combine granulated sugar, corn syrup, salt, and the other 3/4 cup of water in a saucepan. Bring to a boil over high heat, stirring occasionally so that the sugar dissolves. Then cook, without any stirring, until the temperature registers between 235 and 240 degrees Fahrenheit (the soft-ball stage) on a candy thermometer.

When the sugar mixture comes to temperature, remove from heat and stir in the vanilla, and gradually add to the gelatin mixer, with the mixer running with a whisk attachment all the while. Once all the sugar syrup is in the mixer bowl, whisk at high speed until the mixture is very stiff. This will take several minutes.

Martha's instructions simply say to "pour into a prepared dish." I call BS. That marshmallow goo sticks to EVERYTHING. It sticks to the whisk. It clings to the bowl. It grips on the spatula. This is why, previous to my daughter asking me to help her with her school project, I made homemade marshmallows precisely once. It is a bitch to get out of the bowl and into the pan.
We eventually figured that it worked less-horribly to use a plastic (flexible) bench scraper liberally coated in oil to scrape the marshmallow mixture out of the bowl and into the prepared pans. But the oil on the bench scraper made it a slippery little bugger, and it was a far from perfect solution. If any of you, dear readers, have a better way of dealing with this sticky mess, please, PLEASE let me know!

The easiest to get into the prepared pan was definitely the one with 1/2 the gelatin called for in the original recipe (and the amount of gelatin in the recipe above). But it was still kind of a sticky, awful experience. My daughter, by the time we were done with the second batch, turned to me and said, "I'm really sorry I chose this project, Mom. Thank you for helping me." The things we do for love and education.
Let the marshmallows sit in the pan until firm--several hours.

Coat the exposed top of the marshmallows with powdered sugar. Remove the marshmallows from the pan, and coat all of the exposed sides with powdered sugar. Martha's recipe called for cutting the marshmallows with an oiled knife, and that kind of worked for the recipes with more gelatin, but I found it much easier to use a pair of kitchen scissors to cut the marshmallows into squares, especially for the variety with the least gelatin (which was the one we liked best).
Coat all exposed surfaces with powdered sugar; this will keep them from sticking together.
You can also make homemade marshmallows in all sorts of delicious flavors, like these amazing Irish whiskey marshmallows. Or try mixing in freeze dried fruit powders to make amazing fruit-flavored marshmallows. And, of course, nothing beats a homemade marshmallow in gourmet s'mores!
Tips for making Homemade Marshmallows:
- Use a silicone baking dish to set the marshmallows. I even forgot to grease mine (which I do with marshmallows), and they still came out of the pan!
- Coat scissors or knife with a bit of oil to help keep the tool from getting gunked up and sticky while cutting the marshmallows.
- store in a plastic container, with sheets of waxed paper or parchment paper between the layers. The powdered sugar works pretty well to keep the marshmallows from sticking together, but it's not perfect, especially after a few days.

Martha's recipe was fine, but the one everyone liked best was the one with only half the gelatin. When you were given a marshmallow as a kid, did you squish it into a sticky mess, like I always did? That's kind of what the half-gelatin recipe was like, except it was also light and airy like a regular marshmallow, and yet also held its shape (it definitely wasn't marshmallow fluff). It was perfect. Sorry, Martha, I think you got it wrong.
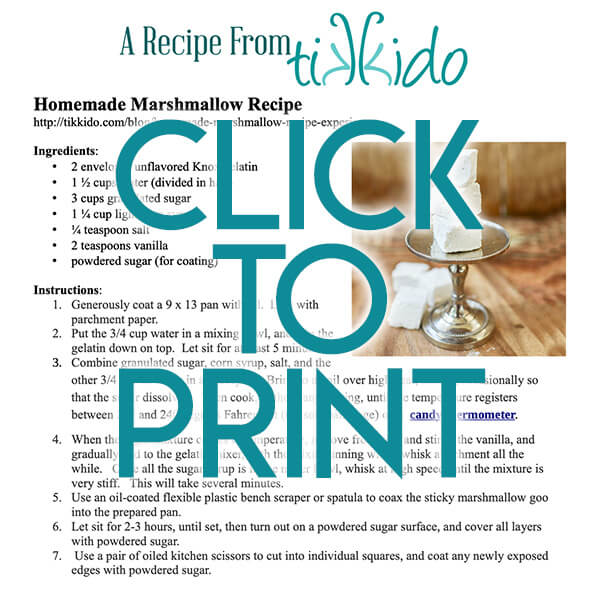
Printable Homemade Marshmallow Recipe:
Want a one page, printable, PDF version of this homemade marshmallow recipe? Click the image below to download the PDF to your device or print directly.
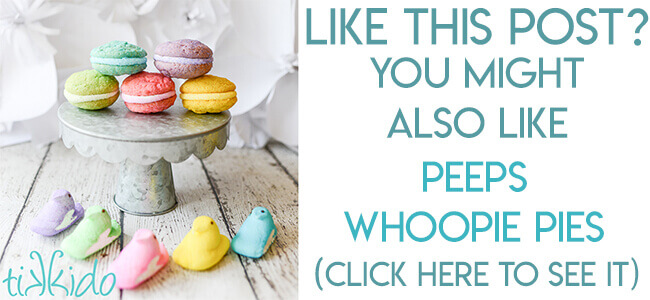
Other Marshmallow Recipes You Might Like:


.png)