Make a gingerbread nativity scene with these free printable templates! Decorate the gingerbread nativity simply, with just a bit of royal icing as shown here, or more elaborately with candy.
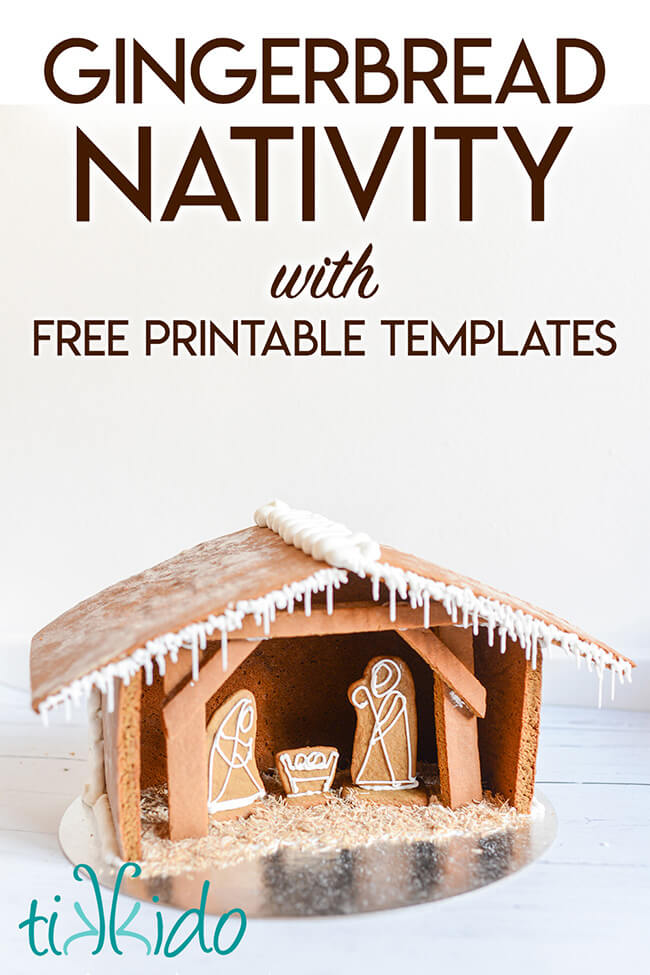
A few years ago, a reader asked if I happened to have a gingerbread nativity template. I didn't, but happily drew up a quick, simple one for her that year. And now I'm finally getting around to sharing my gingerbread nativity design (and free printable gingerbread templates for it) with all of you this year! (For any particular fans of Mr. Bean, scroll down to the bottom of the post for the Mr. Bean gingerbread nativity!)
How to Make a Nativity Gingerbread House
First, you'll obviously need gingerbread house dough. This is the post with my favorite gingerbread recipe (the one I used on Food Network's Holiday Gingerbread Showdown) and all the basic instructions you'll need.
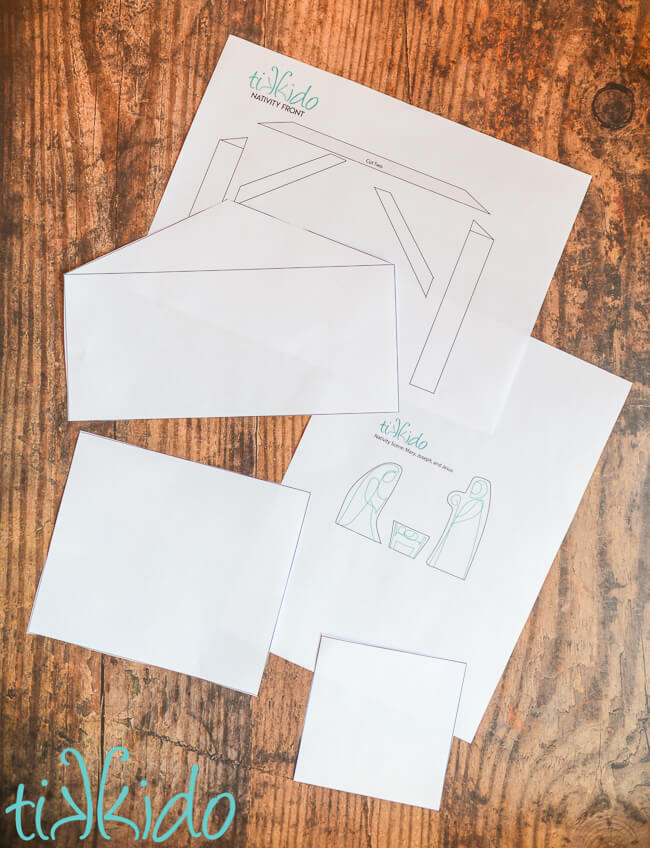
Next, you'll need the templates I've designed.
Free, Printable Gingerbread Nativity Set Templates:
Click on the image below to print the gingerbread nativity templates directly or save to your device.
All of the gingerbread house nativity templates are contained in a single PDF file.
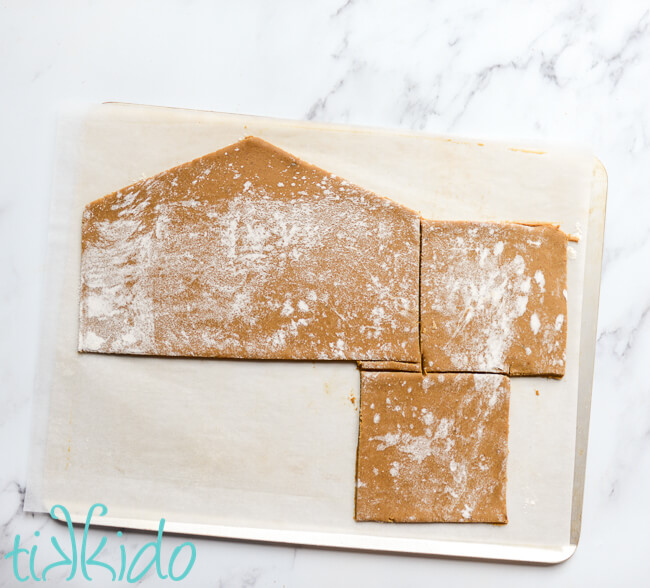
Following the instructions on my basic gingerbread house recipe post, bake up all of the elements of the gingerbread nativity.
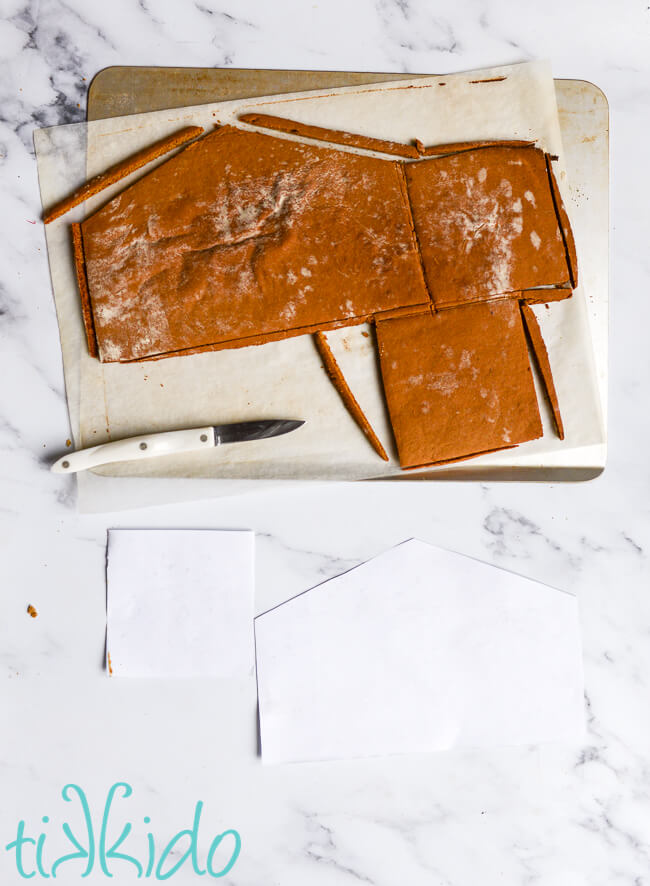
The basic recipe post goes into more detail, but use the template and a sharp paring knife to trim the pieces just after they come out of the oven, while they're still not, so teh shapes will be perfect and fit together well. The trimmings are also delicious for snacking!
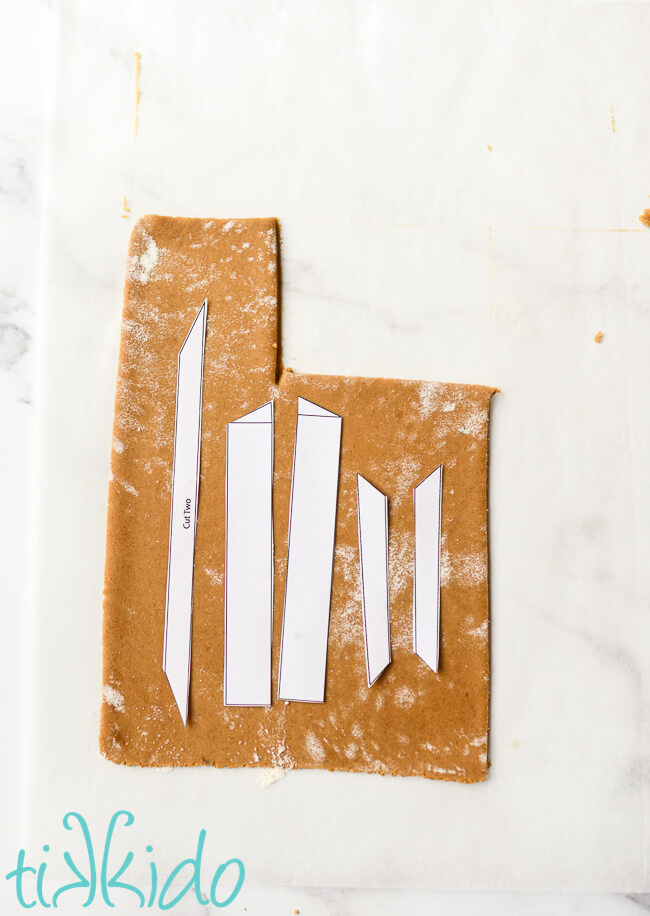
Rather than cut around all these fiddly little pieces, I baked one bigger cookie that had more than enough room for all these parts. I then trimmed the hot, soft, baked cookie to these shapes to make the beams of the nativity stable.
Gingerbread Nativity Scene Figures
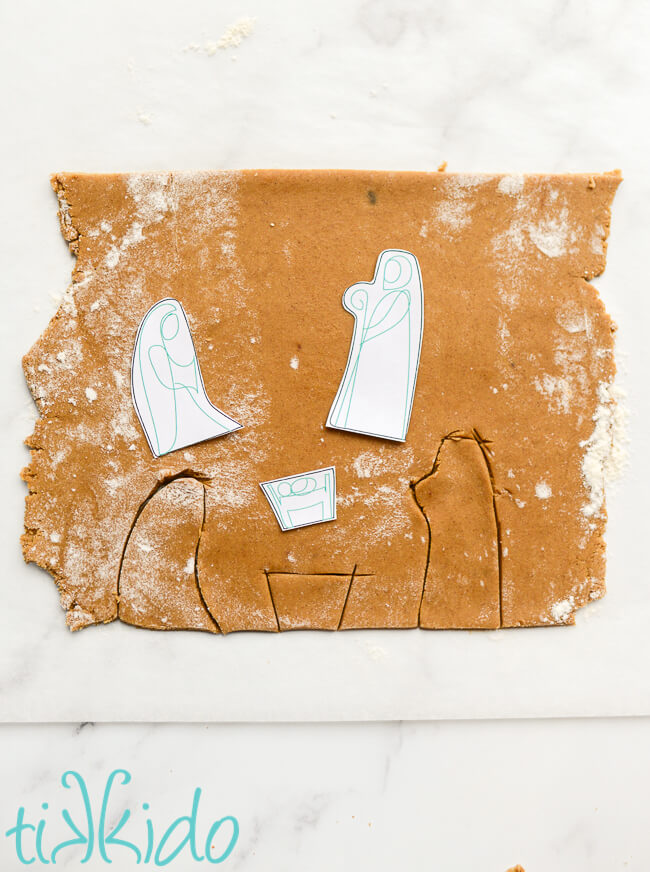
You can make absolutely gorgeous, elaborately decorated gingerbread cookies, but for my nativity scene, I wanted a more figural style. Something simple, that lots of people would feel would be achievable. Cut the basic shapes for Mary, Joseph, and Jesus out of the gingerbread dough, and keep the templates around for guidance when decorating with royal icing.
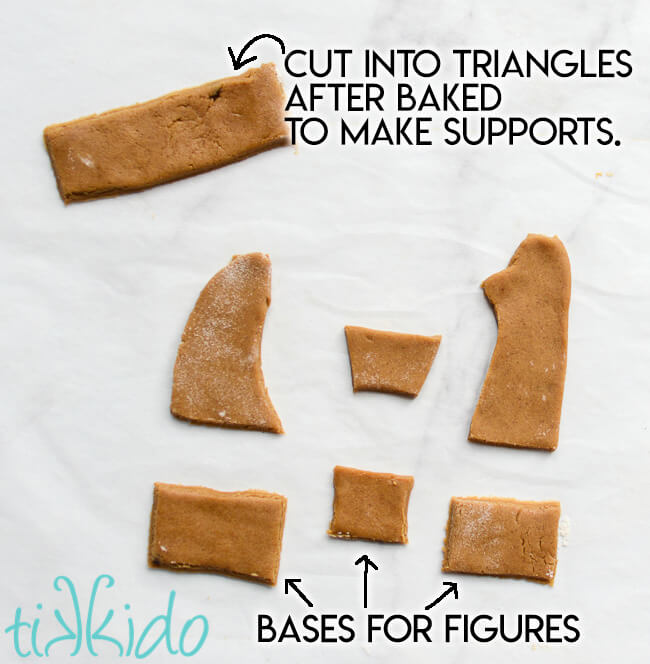
I also cut a few other bits that aren't on the templates. Just simple rectangles for bases for the nativity figures, and another rectangle of dough that I cut into small right triangles after it was cooked to make supports to help keep the figures vertical. (Don't worry, there's a picture below that will go into more detail.)
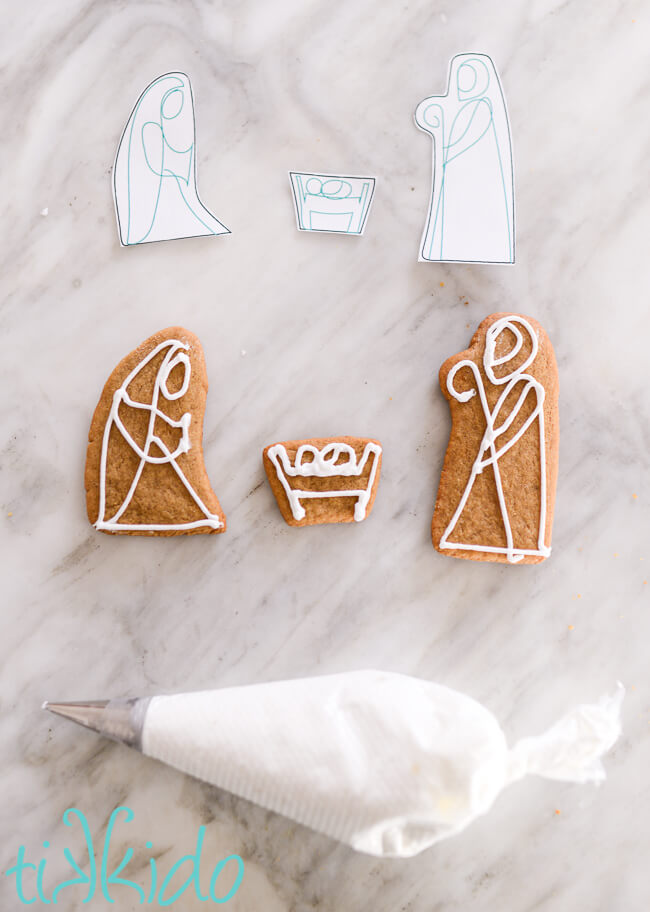
Use royal icing to decorate the gingerbread nativity figures. You can freehand it with icing, like I did, or use a food coloring marker to sketch the design, first.
If you mess up, you can quickly rub off the icing and start again. Wipe with a dry paper towel first, and then, if you need to, use a SLIGHTLY damp paper towel to wipe away any leftover icing. I had to do this once because I royally messed up Joseph's head the first time. I blame the awkward angle I was at while filming the video (because that makes me feel better ;-) ).
Let the icing dry for an hour before assembling on the bases.
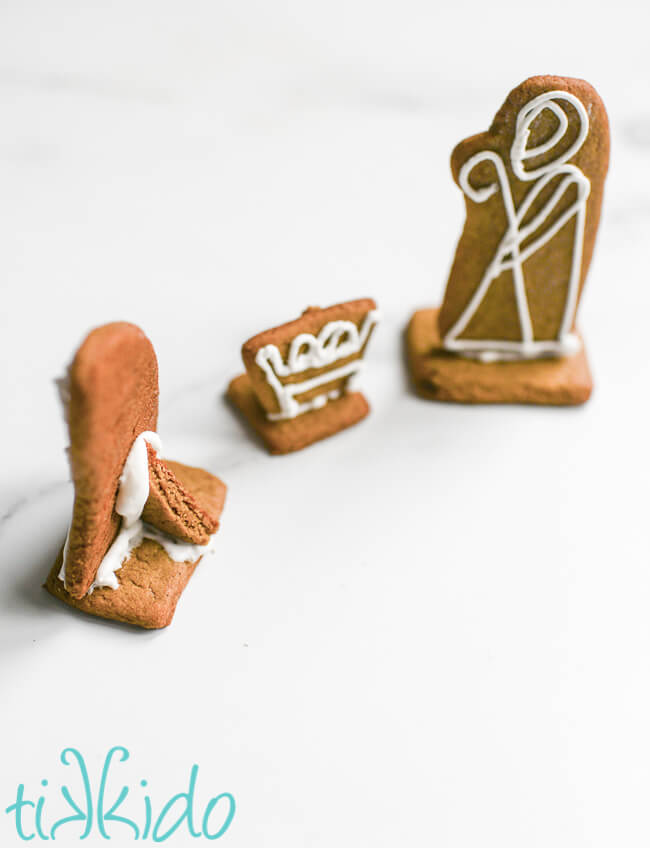
After the icing design has had a chance to dry a bit, you can use more royal icing to attach the gingerbread figures to their bases. Remember the right triangle pieces I mentioned above? You can see how I use them here to support the cookies as the royal icing dries.
Assembling the Nativity Gingerbread House
The front beams of the gingerbread stable are the trickiest bit to assemble. You'll need the pieces from the Nativity Front Templates page, and some more of those tiny triangle pieces we used for supporting the figures.
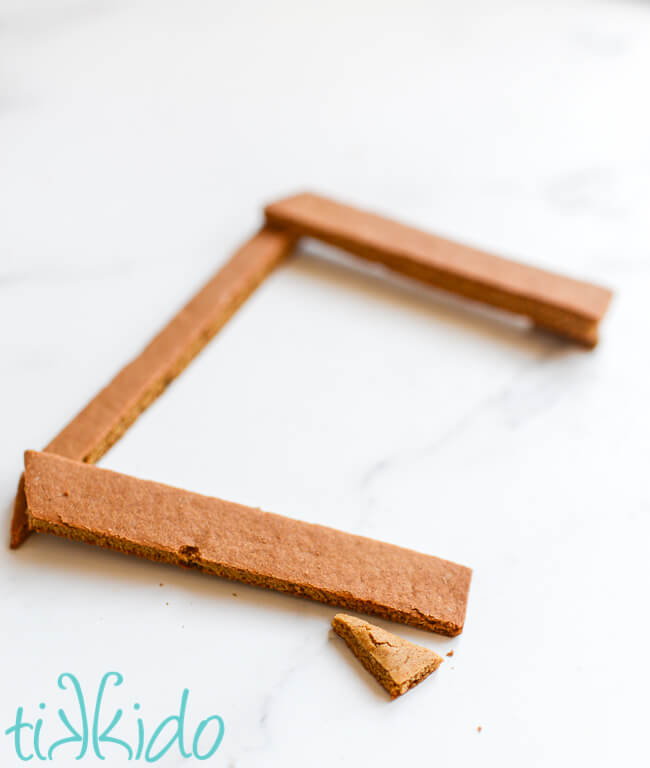
I used more of those tiny triangles of gingerbread to raise each piece of the gingerbread beams to the right level. I show the whole process in the video, if that's a more helpful way for you to understand and learn what I'm showing here.
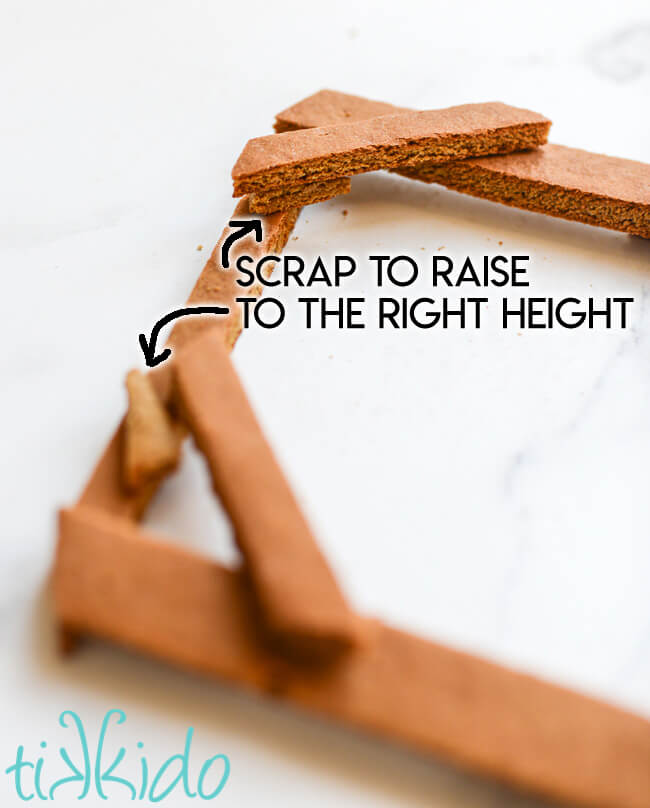
The gingerbread scraps hide nicely behind the visible pieces, and keep everything level.
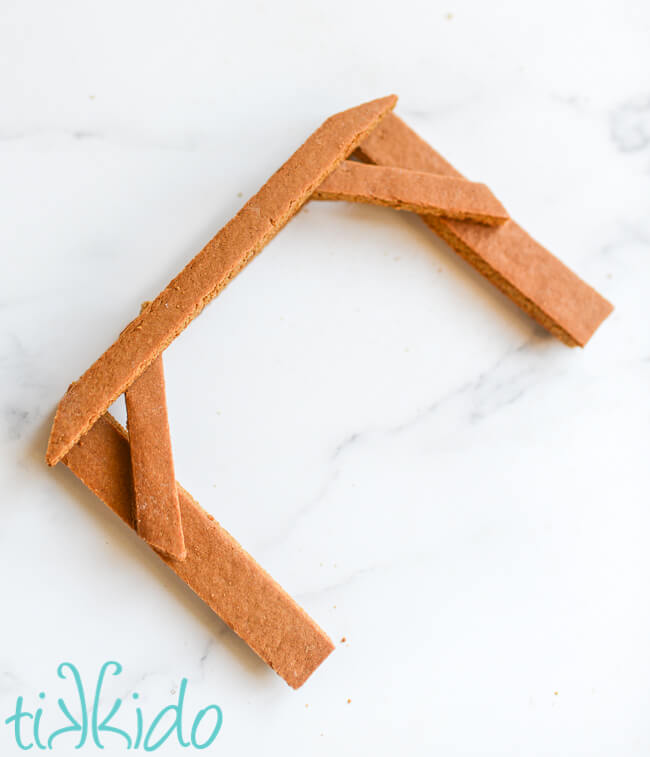
Once you've attached the second horizontal beam to the top of the beam structure, let it dry for several hours before attempting to assemble the gingerbread nativity!
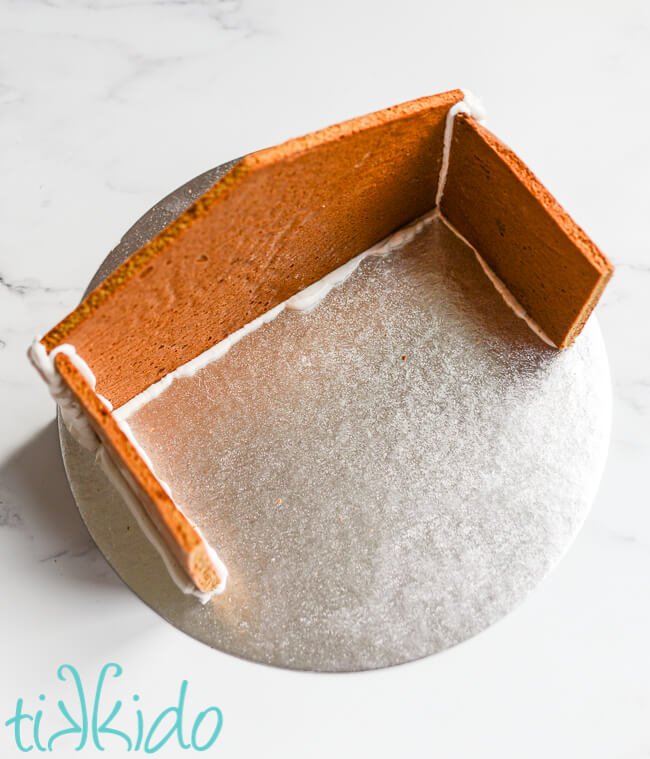
I did assemble the back and sides of the gingerbread stable so that they could be drying at the same time the front beam section was drying.
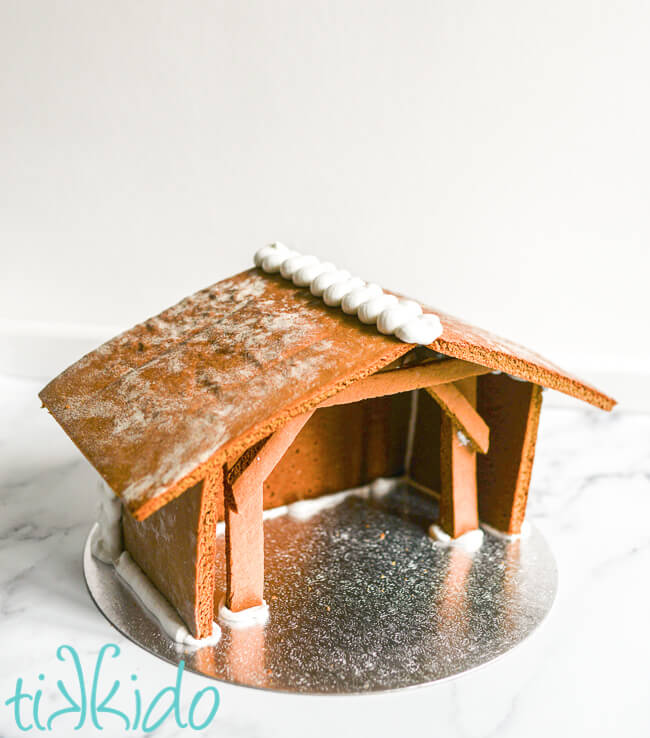
Once the beam section has dried, you can place it in the front of the stable and add the roof sections.
Decorating the Gingerbread House Nativity Scene
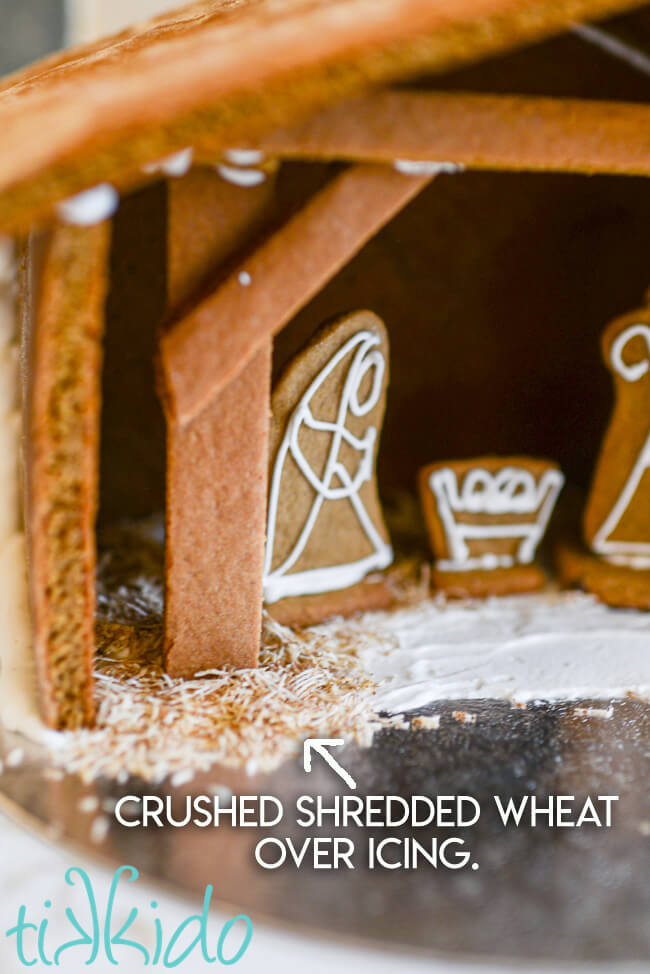
I wanted the decorations on my gingerbread scene to be very simple, and really embrace the natural gingerbread color and white of the royal icing. The only non-gingerbread item I added to my design was some edible straw made from Shredded Wheat cereal.
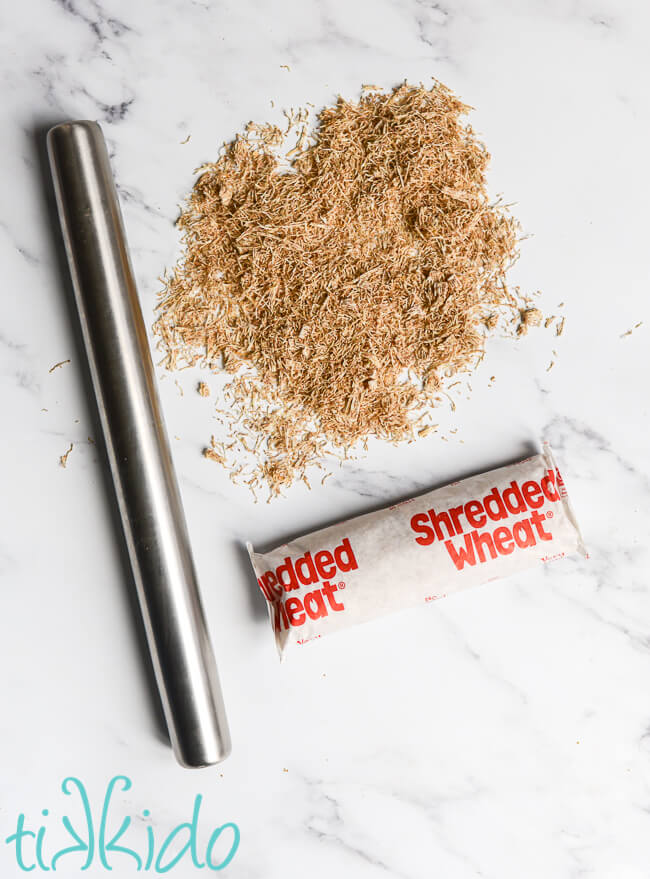
Crushed shredded wheat makes the best hay or straw for gingerbread houses! I used it to make Rumpelstiltskin's pile of gold straw on my Food Network gingerbread appearance.
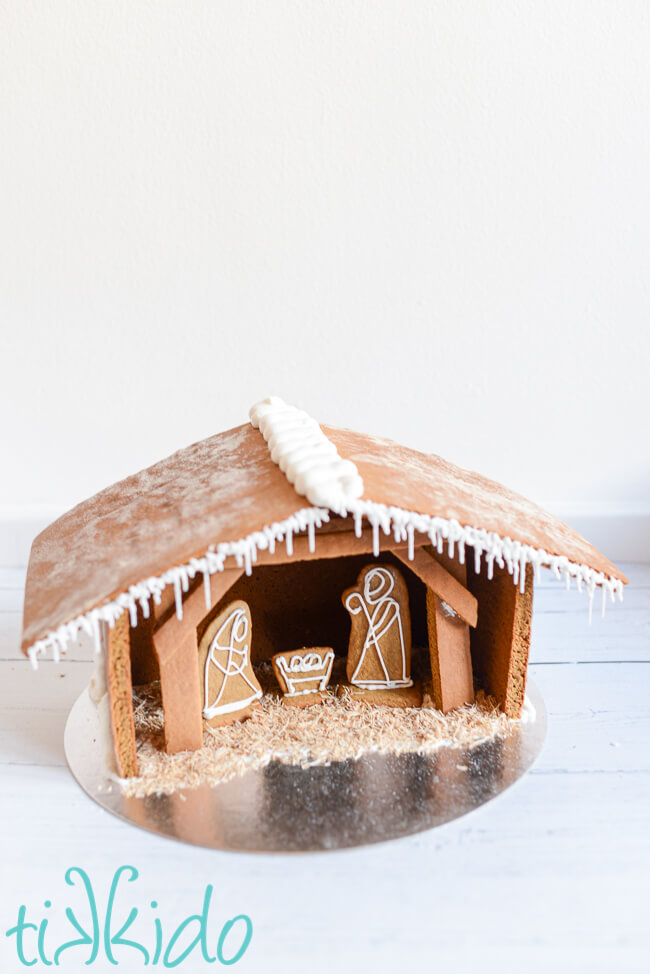
I added some royal icing icicles, but this classic design really doesn't need much decoration to be a beautiful, meaningful addition to your holiday display.
Mr. Bean Nativity Made from Gingerbread
And for any fans of Mr. Bean, I have a very special version of the nativity gingerbread house for you!
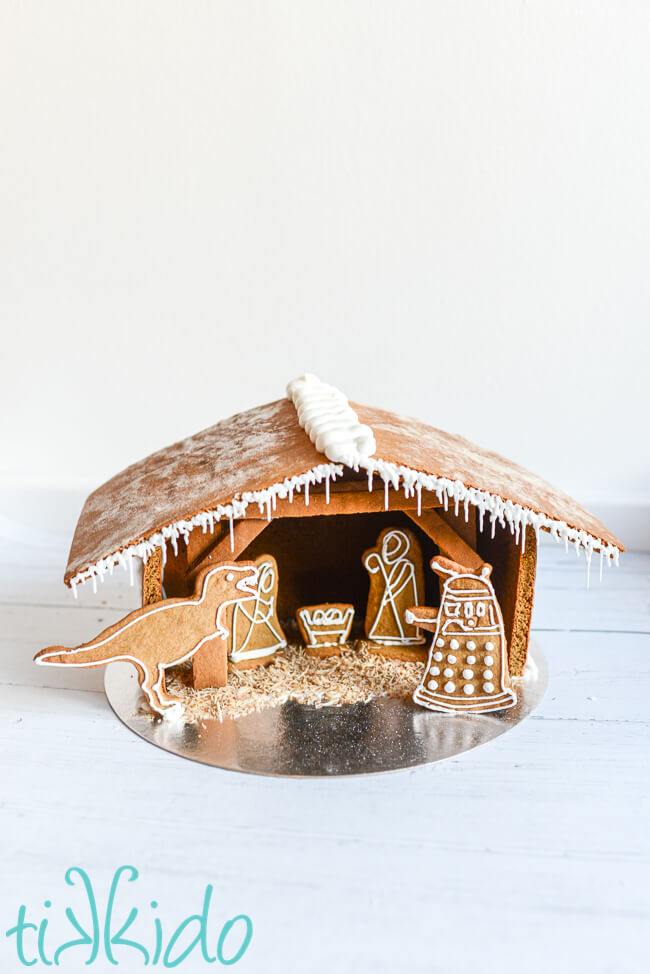
Naughty, noisy dalek and dinosaur! You'll wake the baby.
If you've never seen this classic bit of Mr. Bean, here, for your viewing pleasure, is the scene:
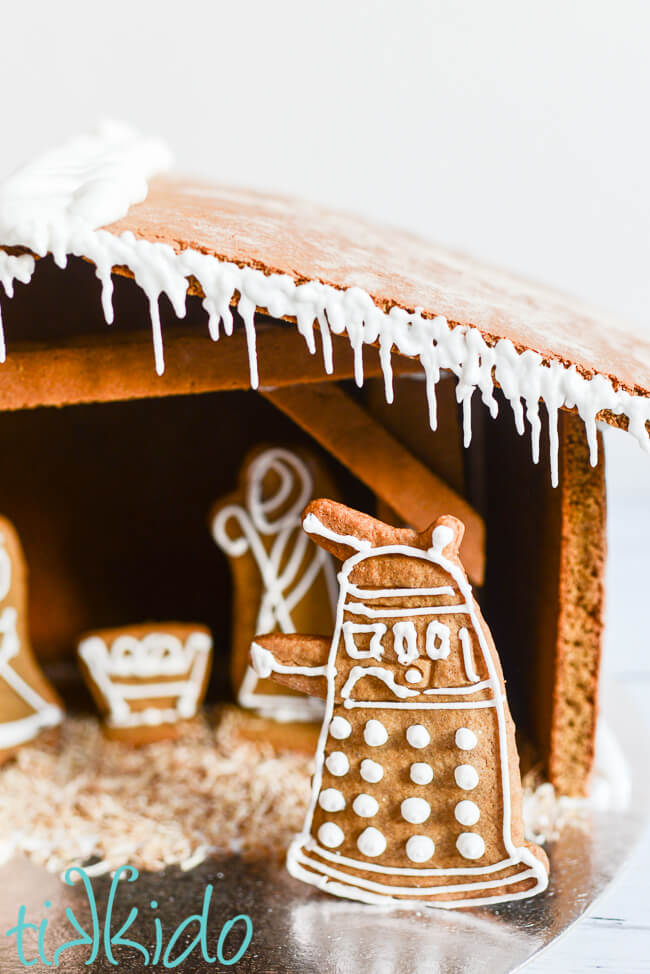
No templates for the dinosaur and dalek, I'm afraid. I used cookie cutters I already had (yes, my collection is that eclectic and extensive that I already had both on hand). This is the Doctor Who cookie cutter set I used, but it looks like it's not currently available. I did find this one for sale that looks pretty similar.
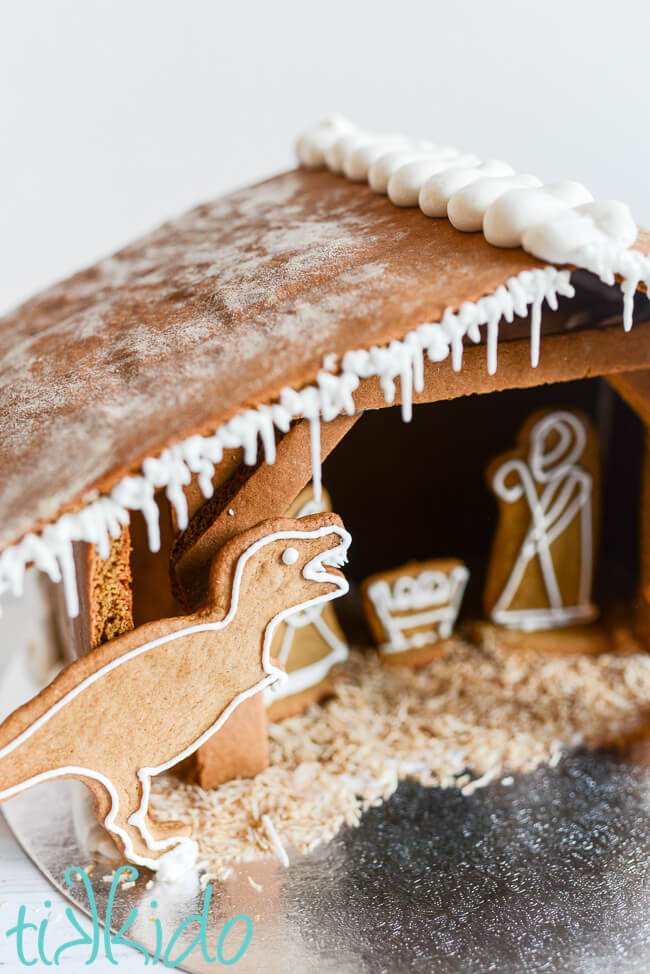
The tyrannosaurus rex gingerbread cookie was made with a t-rex cookie cutter.
Gingerbread for Beginners E-Book
If you'd like to learn all of the tips and tricks we've learned through decades of baking gingerbread, and making thousands (yes, many actual thousands) of gingerbread houses, check out my e-book, Gingerbread for Beginners.




.png)